Toyota Grand Highlander (AS10): Rear seats
The seat position and seatback angle can be adjusted, and the seatback can be folded by operating a seatback angle adjustment lever.
WARNING
■Seat adjustment
- To reduce the risk of sliding under the lap belt during a collision, do not recline the seat more than necessary.
If the seat is too reclined, the lap belt may slide past the hips and apply restraint forces directly to the abdomen, or your neck may contact the shoulder belt, increasing the risk of death or serious injury in the event of an accident.
Adjustments should not be made while driving as the seat may unexpectedly move and cause the driver to lose control of the vehicle.
- Be careful that the seat does not hit passengers or luggage.
- Be careful not to get your hands or feet caught in the seat.
■After adjusting or returning the seats
Observe the following precautions.
Failure to do so may result in death or serious injury.
- Make sure that the seat and seatback are securely locked in position by lightly rocking them back and forth.
- Check that the seat belts are not twisted or caught in the seatback.
■When folding the rear seatbacks down
Observe the following precautions.
Failure to do so may result in death or serious injury.
- Do not fold the seatbacks down while driving.
- Stop the vehicle on level ground, set the parking brake and change the shift position to P.
- Do not allow anyone to sit on a folded seatback or in the luggage compartment while driving.
- Do not allow children to enter the luggage compartment.
- Do not fold down a rear seatback when there are passengers sitting in the rear seats or when there is luggage placed on the rear seats.
- Be careful not to catch your hand when folding the rear seatbacks.
Adjustment procedure
■ Second seats
8-passenger models
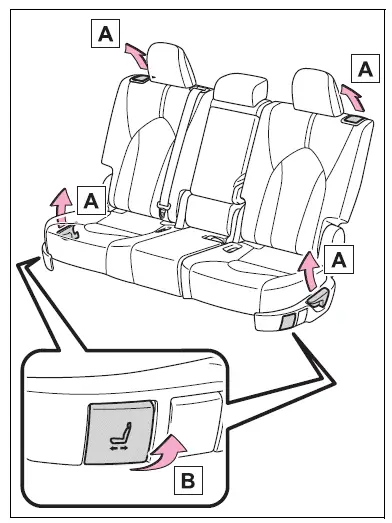
- Seatback angle adjustment lever
- Seat position adjustment lever
7-passenger models
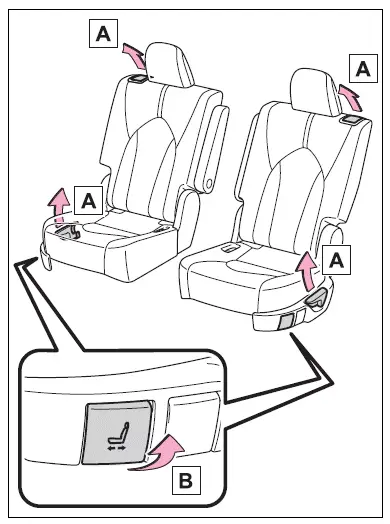
- Seatback angle adjustment lever
- Seat position adjustment lever
■ Third seats
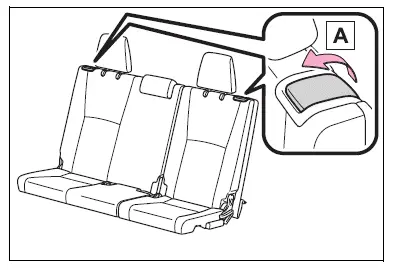
- Seatback angle adjustment lever
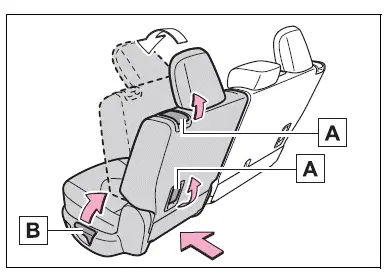
Moving a second seat for third seat access
■ When entering/exiting the vehicle
Pull the seatback angle adjustment lever A or B to tilt the seatback forward and then slide the seat forward.
Make sure that the second seat is free of passengers and obstructions before operating the lever.
■ After passengers have entered/exited the vehicle
Lift up the seatback and slide the seat backward until it locks.
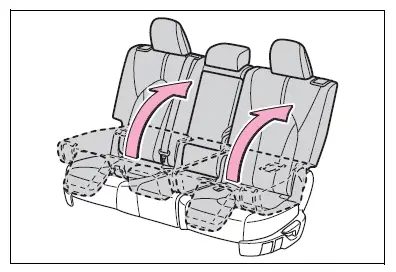
Folding down the second seats
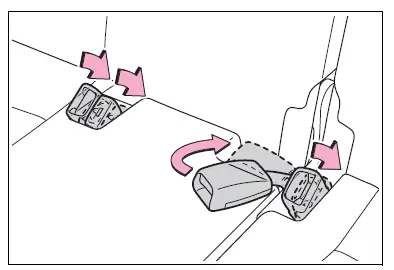
■ Before folding down the second seats
1. Stow the armrest.
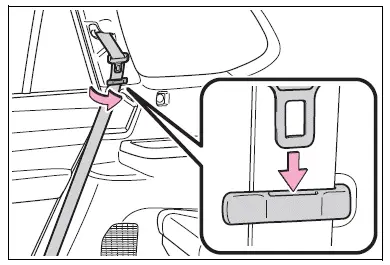
2. Stow the second seat belt buckles.
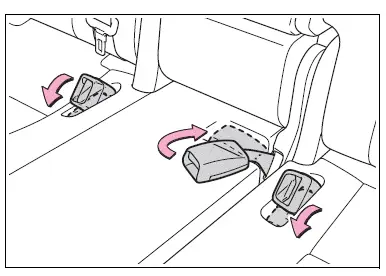
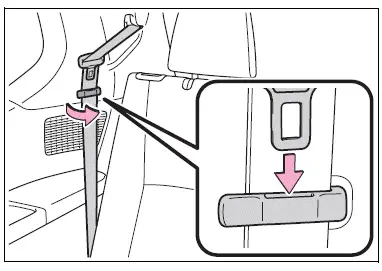
3. Pass the outer seat belts through the seat belt hangers and secure the seat belt plates.
This prevents the shoulder belts from being damaged.
4. Lower the head restraints to the lowest position.
■ Folding down the second seats
1. Pull the seatback angle adjustment lever A or B to tilt the seatback forward.
Each seatback may be folded separately.
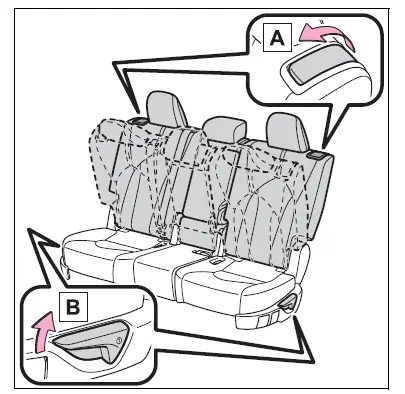
2. Pull the seatback folding lever to unlock the seatback.
The seatback will be folded down.
■ Returning the second seats
Lift up the seatbacks until they lock.
Remove the secured seat belts from the seat belt hangers before using them.
Folding down the third seats
■ Before folding down the third seats
1. Stow the third seat belt buckles.
2. Pass the outer seat belts through the seat belt hangers and secure the seat belt plates.
This prevents the shoulder belts from being damaged.
3. Lower the center head restraint to the lowest position.
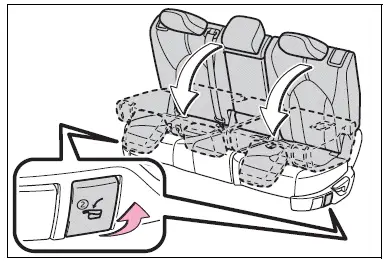
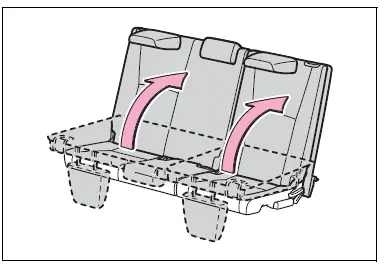
■ Folding down the third seats
While pulling the seatback angle adjustment lever, fold down the seatbacks.
The outer head restraints will fold forward.
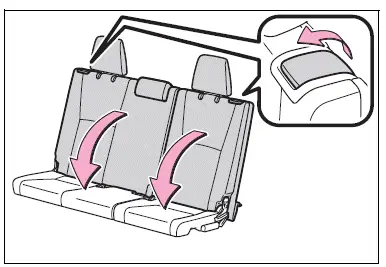
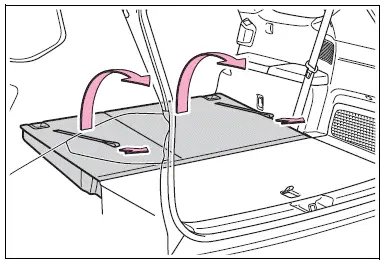
■ Returning the third seats
1. Returning the seatbacks
From inside
Lift up the seatbacks until they lock.
From outside
Pull the straps and raise the seatbacks until they lock.
After using either strap, use the velcro on the strap to attach it to the seatback.
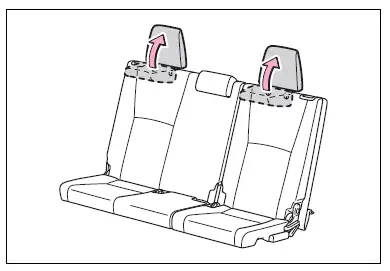
2. Returning the outer head restraints.
Remove the secured seat belts from the seat belt hangers before using them.


Similar pages:
Head-up display
The head-up display projects
a variety of driving-
related information and
the operating state of the
driving support systems on
the windshield.
System components
Can be changed the head-up
display type.
The content displayed will differ
according to the driving conditions
and display mode of the
...
Meter display
■ Locations of gauges and meters
The units used on the meters may differ depending on the target region.
Engine coolant temperature gauge
Displays the engine coolant temperature
Outside temperature
Displays the outside temperature within the range of -40ºF (-40ºC) to 141ºF
(60ºC)
Speed ...