Toyota Grand Highlander (AS10) 2024 Owners Manual / Before driving / Adjusting the seats / Head restraints
Toyota Grand Highlander (AS10): Head restraints
Head restraints are provided for all seats.
WARNING
■Head restraint precautions
Observe the following precautions regarding the head restraints.
Failure to do so may result in death or serious injury.
- Use the head restraints designed for each respective seat.
- Adjust the head restraints to the correct position at all times.
- After adjusting the head restraints, push down on them and make sure they are locked in position.
- Do not drive with the head restraints removed.
- When sitting on the third seat, make sure that the head restraint is not folded.
Adjusting a head restraint vertically
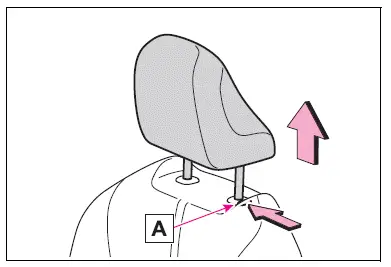
■ Front seats
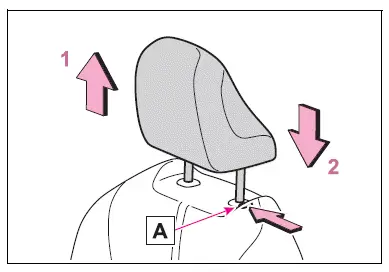
- Up
Pull the head restraints up.
- Down
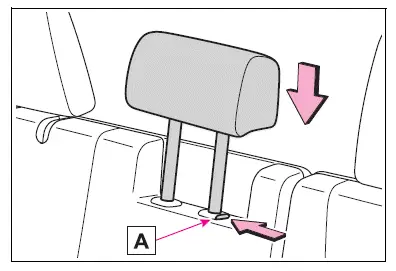
Push the head restraint down while pressing the lock release button A.
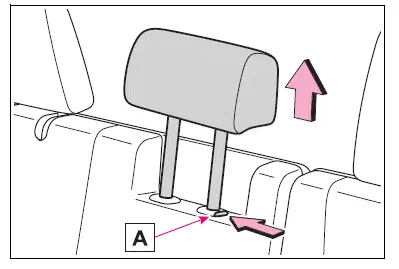
■ Second seats
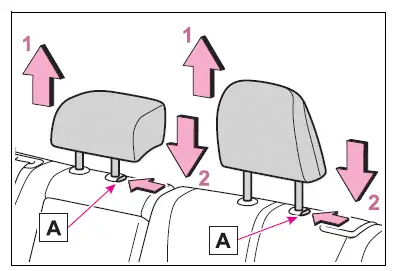
- Up
Pull the head restraints up.
- Down
Push the head restraint down while pressing the lock release button A.
■ Third center seat
- Up
Pull the head restraints up.
- Down
Push the head restraint down while pressing the lock release button A.
■Adjusting the height of the head restraints
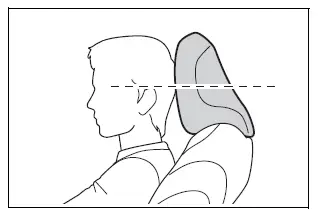
Make sure that the head restraints are adjusted so that the center of the head restraint is closest to the top of your ears.
■Adjusting the rear center seat head restraints
Always raise the head restraint one level from the stowed position when using.
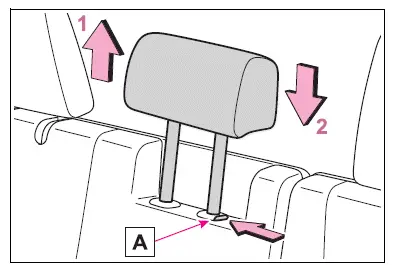
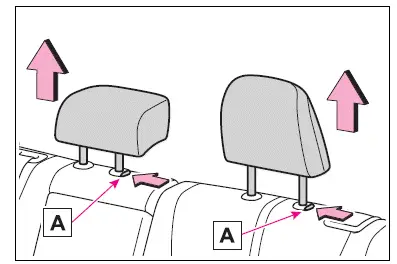
Removing the head restraints
Pull the head restraint up while pressing the lock release button A.
If the head restraint touches the ceiling, making the removal difficult, change the seat height or angle.
Front seats
Second seats
Third center seat
Installing the head restraints
Align the head restraint with the installation holes and push it down to the lock position.
Press and hold the lock release button A when lowering the head restraint.
Front seats
Second seats

Third center seat


Similar pages:
BSM (Blind Spot Monitor)
The Blind Spot Monitor is a
system that uses rear side
radar sensors installed on
the inner side of the rear
bumper on the left and right
side to assist the driver in
confirming safety when
changing lanes.
WARNING
■Cautions regarding the use of
the system
The driver is solely responsible
for sa ...
Checking and replacing fuses
If any of the electrical components
do not operate, a
fuse may have blown. If this
happens, check and replace
the fuses as necessary.
Checking and replacing
fuses
1. Turn the engine switch off.
2. Open the fuse box cover.
Engine compartment
Push in the claw and remove the
lid.
Type A
Type B
...